Table of contents
- Task 1. Initialize Your Lab
- Task 2. Create the Git repositories in Cloud Source Repositories
- Task 3. Create a Container image with Cloud Build
- Task 4. Create the Continuous Integration (CI) pipeline
- Task 5. Create the Test Environment and CD pipeline
- Task 6. Review Cloud Build Pipeline
- Task 7. Test the complete pipeline
- Task 8. Test Rollback
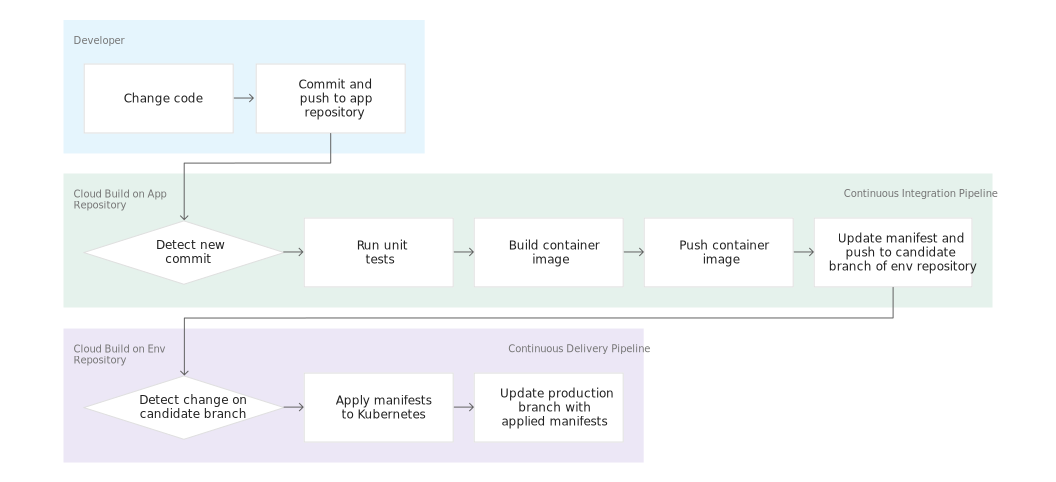
Pada Lab Cloud Skill Boost ini, kita membuat CI/CD pipeline yang mengotomasi build container image Cloud Build dari code commit, image di simpan di Artifact Registry, dan Deploy ke Google Kubernetes Engines.
Di lab ini kita membuat 2 Git Repo:
app repo
env repo
Gambar di atas gamabaran flow pipeline CI/CD.
Task 1. Initialize Your Lab
set variable yang akan mendukung command Cloud Shell.
 export PROJECT_ID=$(gcloud config get-value project)
 export PROJECT_NUMBER=$(gcloud projects describe $PROJECT_ID --format='value(projectNumber)')
 export REGION=
 gcloud config set compute/region $REGION
Enable APIs GKE, Cloud Build, Cloud Source Repositories, dan Container Analysis
 gcloud services enable container.googleapis.com \
     cloudbuild.googleapis.com \
     sourcerepo.googleapis.com \
     containeranalysis.googleapis.com
Buat Artifact Registry Docker Repository dengan nama my-repository
 gcloud artifacts repositories create my-repository \
   --repository-format=docker \
   --location=$REGION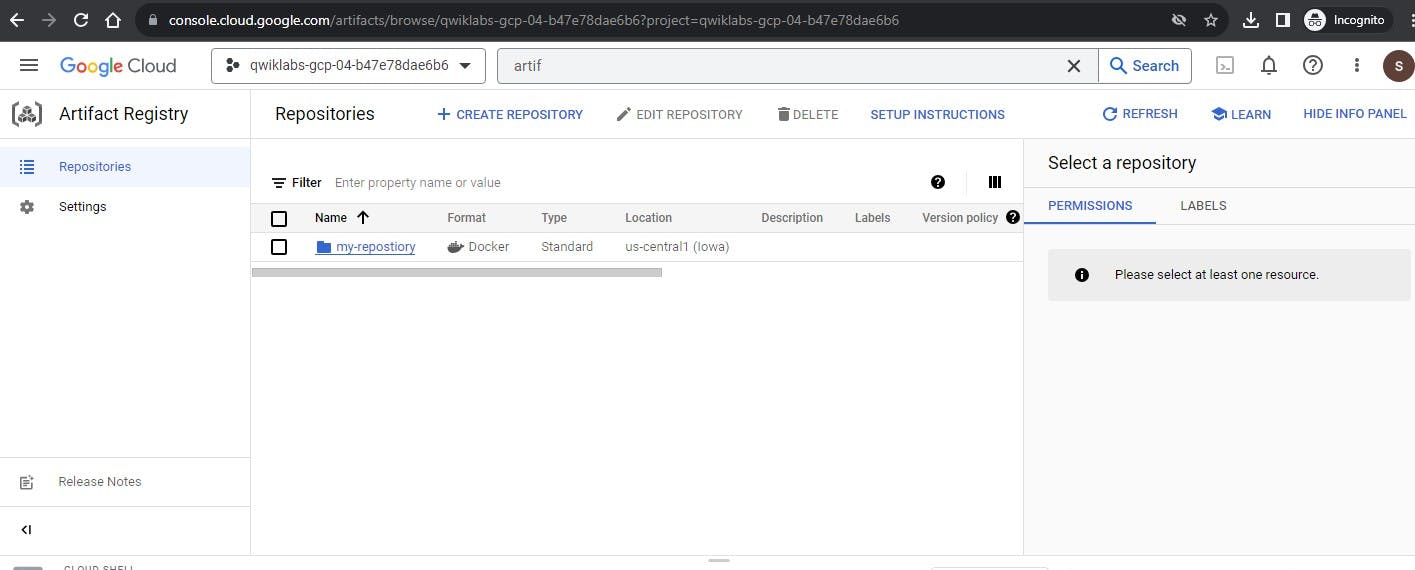
Buat GKE Cluster untuk mendeploy sample aplikasi, kita buat 1 nodes.
gcloud container clusters create hello-cloudbuild --num-nodes 1 --region $REGION
set git config menggunakan email dan user generate lab.
 git config --global user.email "you@example.com"
 git config --global user.name "Your Name"
Task 2. Create the Git repositories in Cloud Source Repositories
Pada task ini kita membuat 2 git repo (hello-cloudbuild-app and hello-cloudbuild-env).
create git repo
 gcloud source repos create hello-cloudbuild-app
 gcloud source repos create hello-cloudbuild-env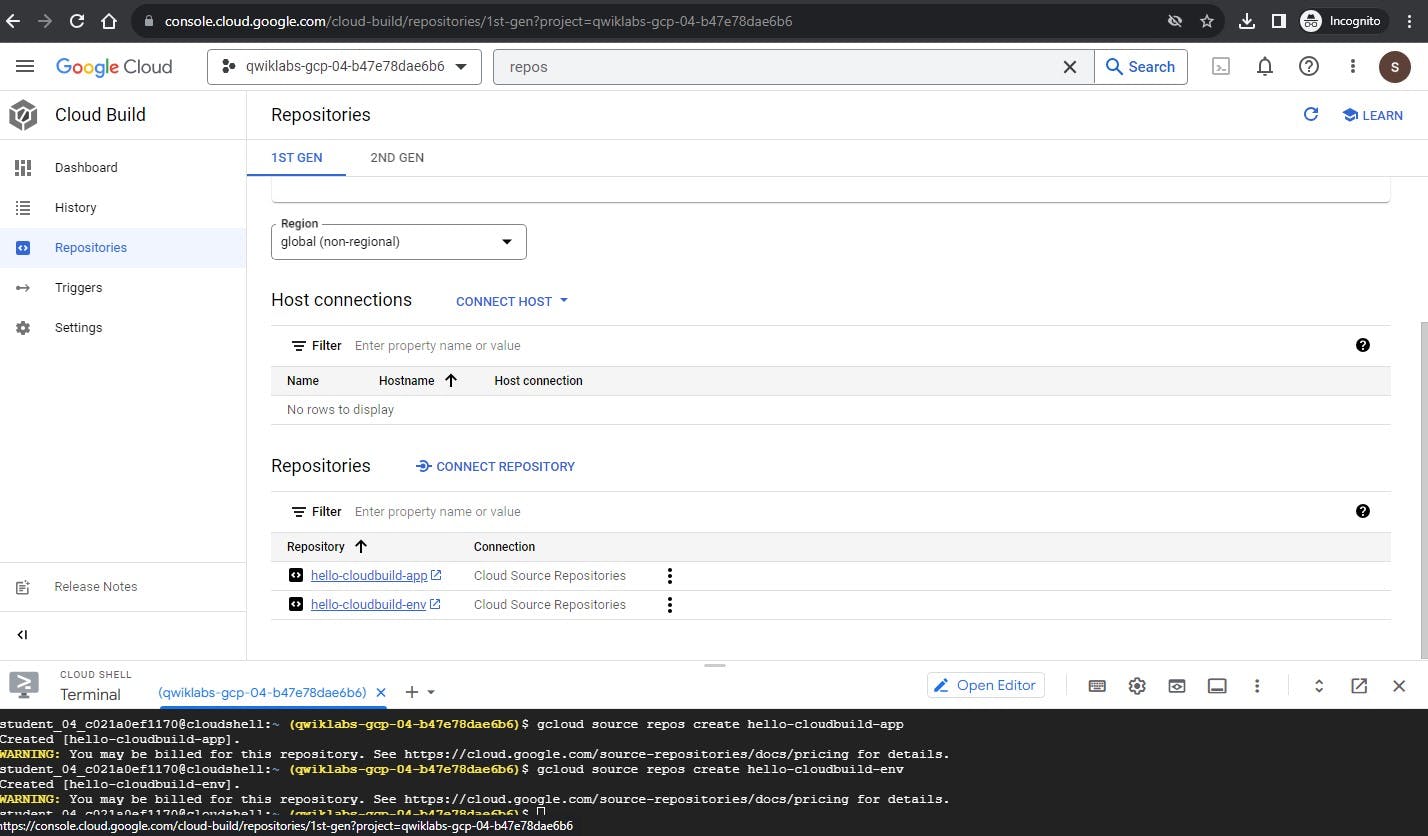
Clone sample code dari Github
 cd ~
 git clone https://github.com/GoogleCloudPlatform/gke-gitops-tutorial-cloudbuild hello-cloudbuild-app
Config cloud source repo sebagai remote
 cd ~/hello-cloudbuild-app
 PROJECT_ID=$(gcloud config get-value project)
 git remote add google "https://source.developers.google.com/p/${PROJECT_ID}/r/hello-cloudbuild-app"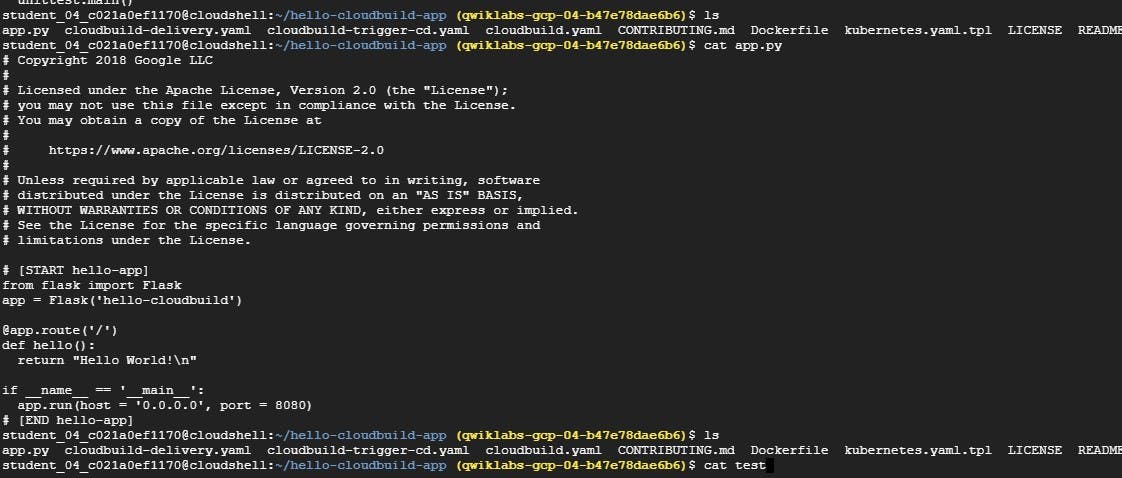
Task 3. Create a Container image with Cloud Build
Dockerfile sudah terbuat di dalam app yang sudah di clone dari Github.
FROM python:3.7-slim
RUN pip install flask
WORKDIR /app
COPY app.py /app/app.py
ENTRYPOINT ["python"]
CMD ["/app/app.py"]
buat Cloud Build base commit terakhir
 cd ~/hello-cloudbuild-app
 COMMIT_ID="$(git rev-parse --short=7 HEAD)"
 gcloud builds submit --tag="${REGION}-docker.pkg.dev/${PROJECT_ID}/my-repository/hello-cloudbuild:${COMMIT_ID}" .
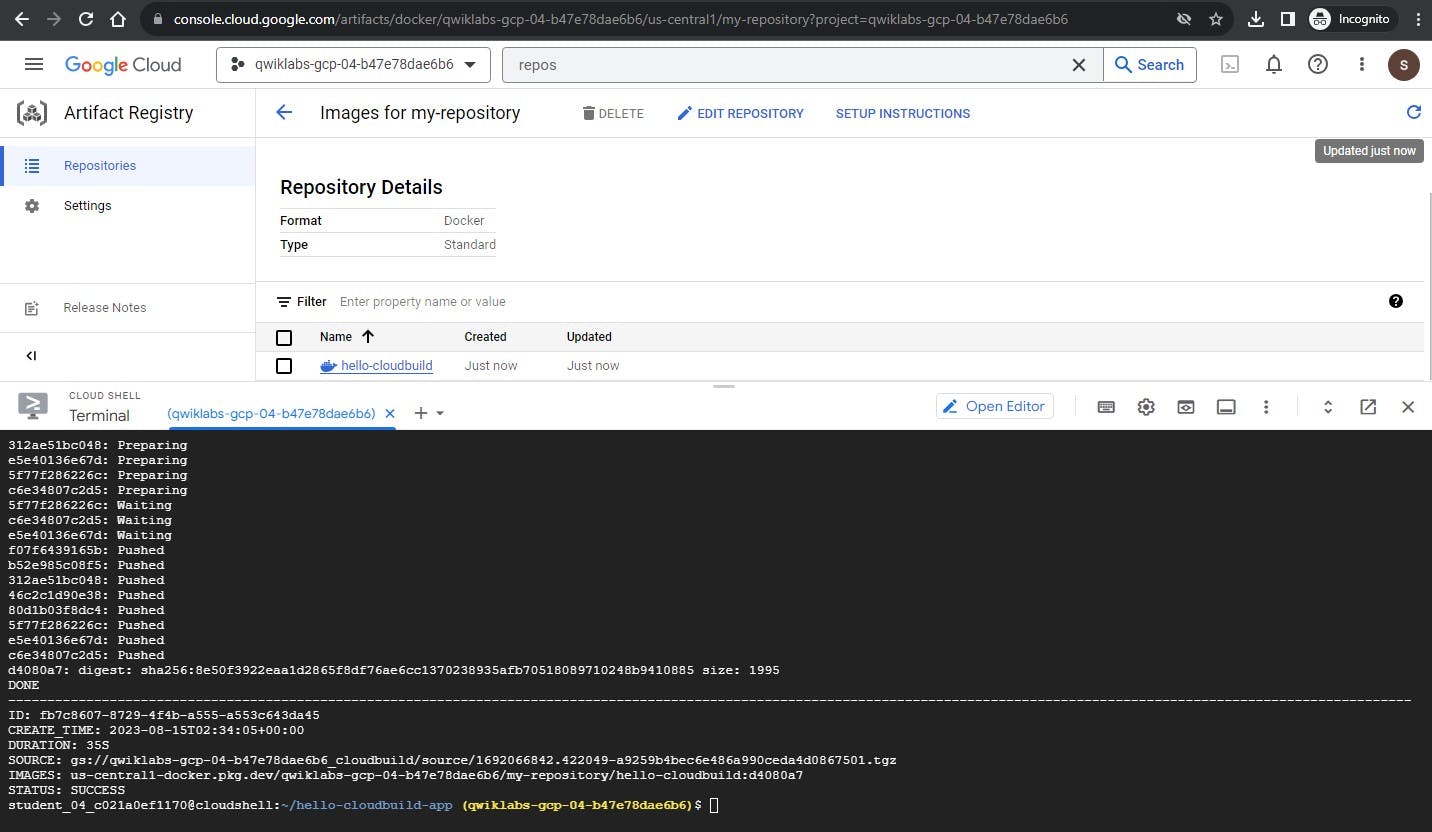
Jika sudah selesai build, di Artifact Registry > Repository akan terbentuk container image, klik my-repository
Task 4. Create the Continuous Integration (CI) pipeline
Pada Tahap ini akan mengkonfigurasi small unit test, yaitu otomasi build container image yang di trigger (Cloud Build) dari commit last dari branch yang di bentuk dan di push ke Artifact Registry.
Step:
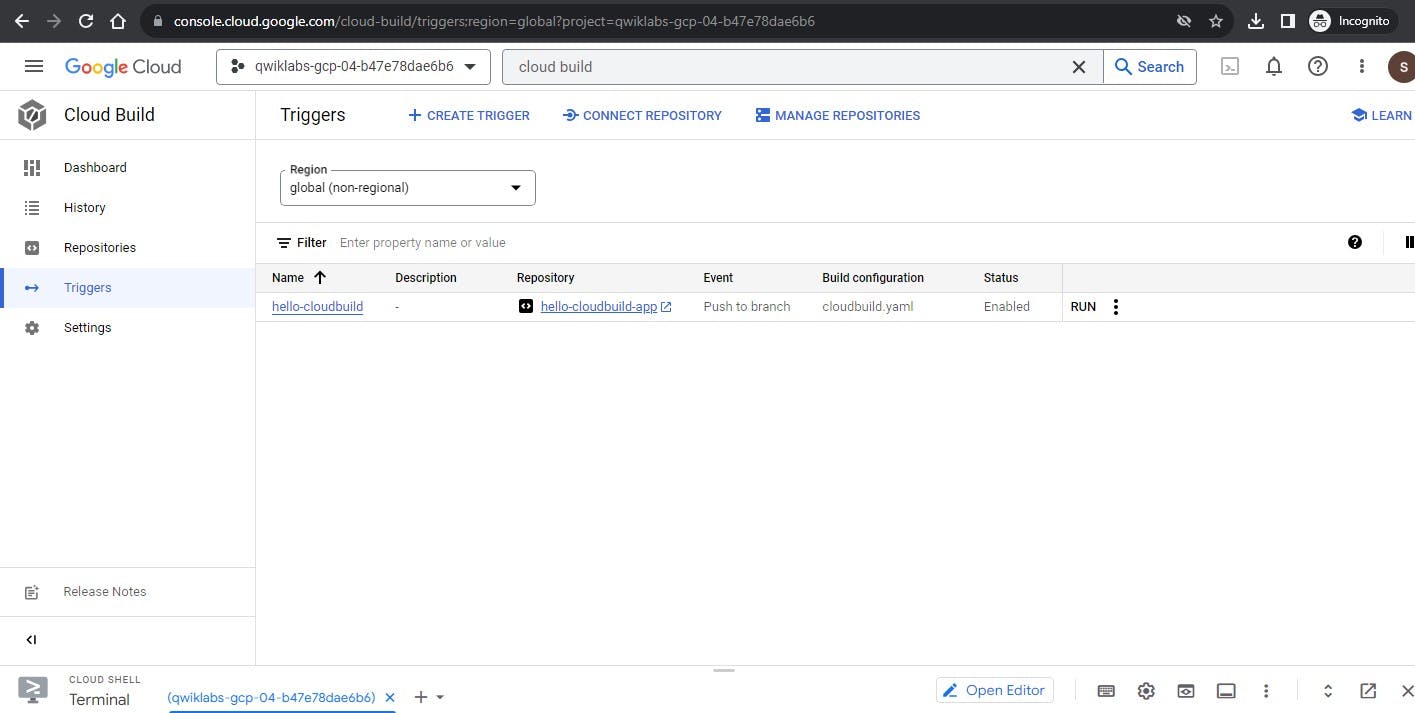
Ke Cloud Build > Triggers
Create Trigger
Buat nama field
Bagian Event, select Push to a branch
Bagian Source, pilih Repo di sini kita tadi buat hello-cloudbuild-app, dan set Branch ke .* (any branch)
Bagian Build Configuration, type cloudbuild.yaml.
Create
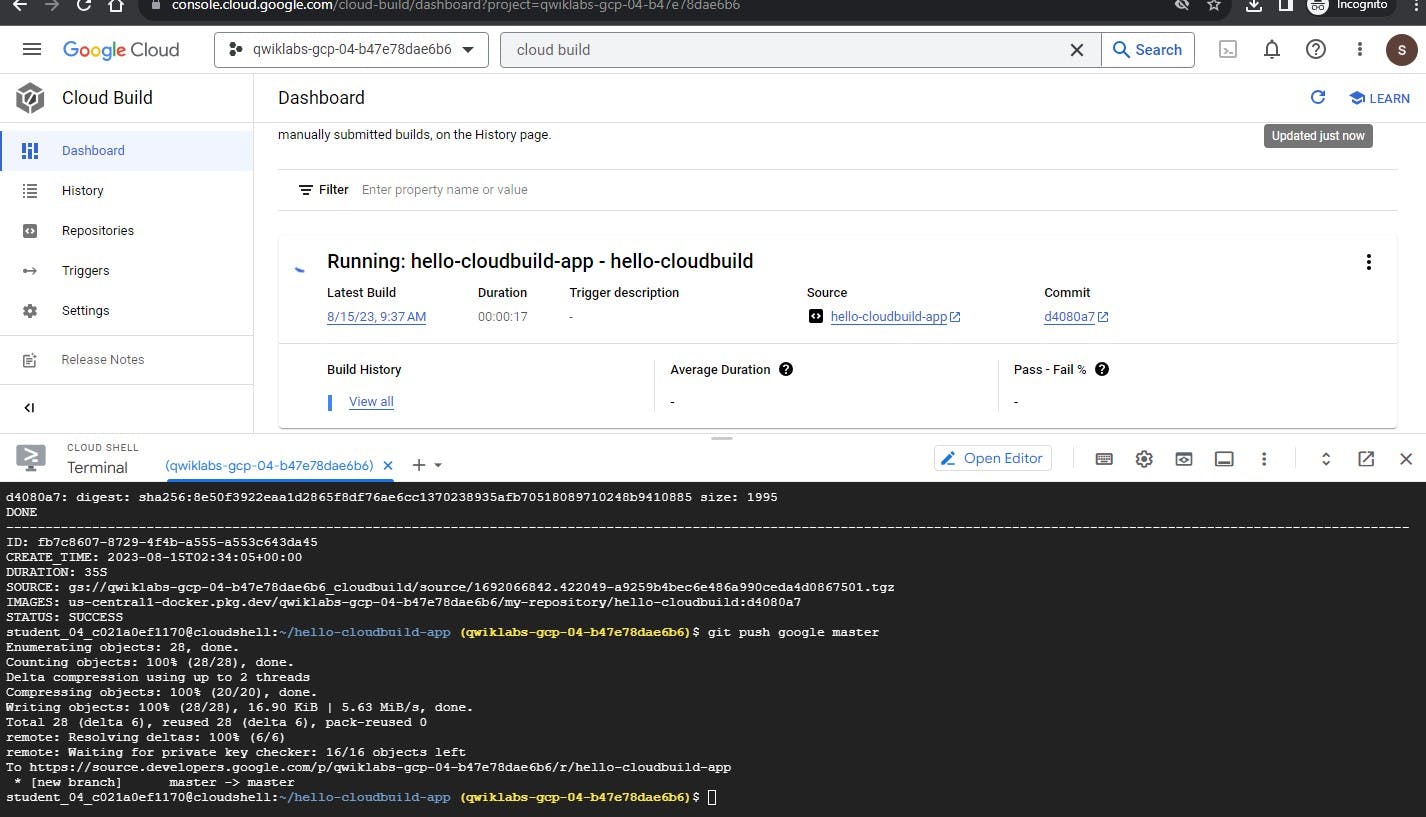
untuk start trigger, run command
cd ~/hello-cloudbuild-app
git push google master
watch prosess build image container
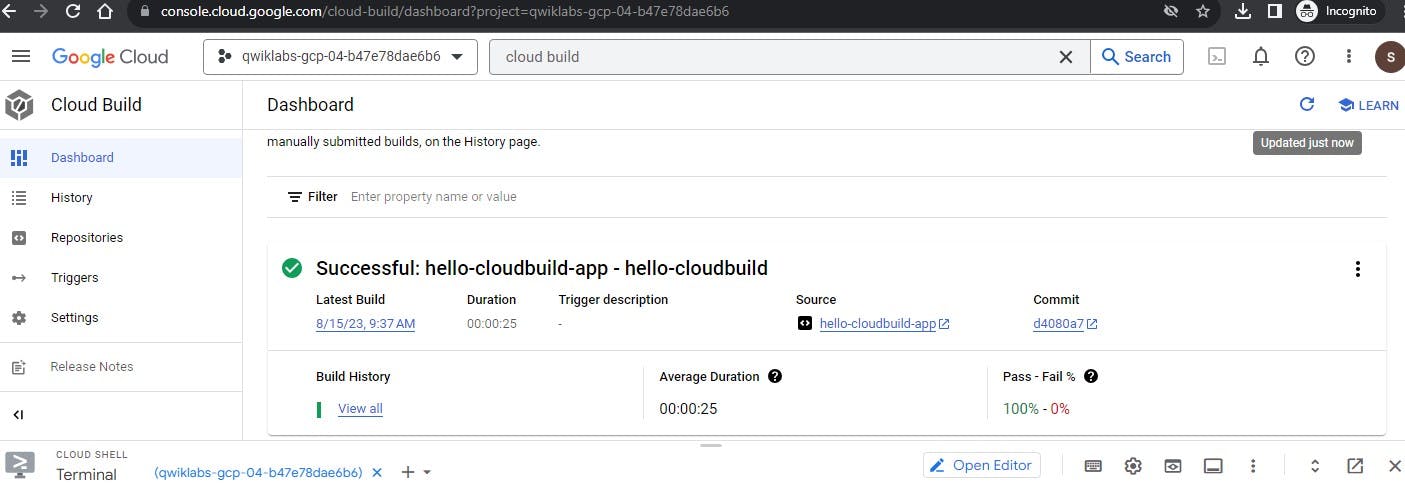
success build container image
Task 5. Create the Test Environment and CD pipeline
Cloud Build juga dapat di pakai untuk Continuous Delivery (CD) pipeline.
Grant Cloud Build access Ke GKE
PROJECT_NUMBER="$(gcloud projects describe ${PROJECT_ID} --format='get(projectNumber)')"

gcloud projects add-iam-policy-binding ${PROJECT_NUMBER} \
--member=serviceAccount:${PROJECT_NUMBER}@cloudbuild.gserviceaccount.com \
--role=roles/container.developer
selanjutnya kita initialize clone repo hello-cloudbuild-env dengan 2 branche (production dan candidate).
cd ~
gcloud source repos clone hello-cloudbuild-env
cd ~/hello-cloudbuild-env
git checkout -b production
next copy file cloudbuild-delivery.yaml ke repo hello-cloudbuild-app
cd ~/hello-cloudbuild-env
cp ~/hello-cloudbuild-app/cloudbuild-delivery.yaml ~/hello-cloudbuild-env/cloudbuild.yaml
git add .
git commit -m "Create cloudbuild.yaml for deployment"
file cloudbuild-delivery.yaml
# [START cloudbuild-delivery]
steps:
# This step deploys the new version of our container image
# in the hello-cloudbuild Kubernetes Engine cluster.
- name: 'gcr.io/cloud-builders/kubectl'
  id: Deploy
  args:
  - 'apply'
  - '-f'
  - 'kubernetes.yaml'
  env:
  - 'CLOUDSDK_COMPUTE_REGION=us-central1'
  - 'CLOUDSDK_CONTAINER_CLUSTER=hello-cloudbuild'

# This step copies the applied manifest to the production branch
# The COMMIT_SHA variable is automatically
# replaced by Cloud Build.
- name: 'gcr.io/cloud-builders/git'
  id: Copy to production branch
  entrypoint: /bin/sh
  args:
  - '-c'
  - |
    set -x && \
    # Configure Git to create commits with Cloud Build's service account
    git config user.email $(gcloud auth list --filter=status:ACTIVE --format='value(account)') && \
    # Switch to the production branch and copy the kubernetes.yaml file from the candidate branch
    git fetch origin production && git checkout production && \
    git checkout $COMMIT_SHA kubernetes.yaml && \
    # Commit the kubernetes.yaml file with a descriptive commit message
    git commit -m "Manifest from commit $COMMIT_SHA
    $(git log --format=%B -n 1 $COMMIT_SHA)" && \
    # Push the changes back to Cloud Source Repository
    git push origin production
# [END cloudbuild-delivery]
jadi file di atas mendeskripsikan process deployment yang di jalankan di Cloud Build. Ada 2 steps :
cloud build apply manifest di cluster GKE
jika sukses, cloud build copy manifest di branch production
Buat branch candidate dan push branch keduanya agar tersedia di Cloud Source Repositories
git checkout -b candidate
git push origin production
git push origin candidate
berikan role IAM Source Repository Writer ke Cloud Build service account
PROJECT_NUMBER="$(gcloud projects describe ${PROJECT_ID} \
--format='get(projectNumber)')"
cat >/tmp/hello-cloudbuild-env-policy.yaml <<EOF
bindings:
- members:
  - serviceAccount:${PROJECT_NUMBER}@cloudbuild.gserviceaccount.com
  role: roles/source.writer
EOF
gcloud source repos set-iam-policy \
hello-cloudbuild-env /tmp/hello-cloudbuild-env-policy.yaml
Create trigger di Cloud build untuk Continuous Delivery pipeline
Cloud Build > Triggers
Create Trigger
Masukan Field Nama
Bagian Event, pilih Push to a branch.
Bagian Source pilih hello-cloudbuild-env sebagai Repository dan ^candidate$ sebagai Branch
Bagian Cloud Build configuration file location, masukan cloudbuild.yaml
Create
Modifikasi CI Pipeline untuk trigger ke Pipeline CD
cd ~/hello-cloudbuild-app
cp cloudbuild-trigger-cd.yaml cloudbuild.yaml
file cloudbuild-trigger-cd.yaml
steps:
# This step runs the unit tests on the app
- name: 'python:3.7-slim'
  id: Test
  entrypoint: /bin/sh
  args:
  - -c
  - 'pip install flask && python test_app.py -v'

# This step builds the container image.
- name: 'gcr.io/cloud-builders/docker'
  id: Build
  args:
  - 'build'
  - '-t'
  - 'us-central1-docker.pkg.dev/$PROJECT_ID/my-repository/hello-cloudbuild:$SHORT_SHA'
  - '.'

# This step pushes the image to Artifact Registry
# The PROJECT_ID and SHORT_SHA variables are automatically
# replaced by Cloud Build.
- name: 'gcr.io/cloud-builders/docker'
  id: Push
  args:
  - 'push'
  - 'us-central1-docker.pkg.dev/$PROJECT_ID/my-repository/hello-cloudbuild:$SHORT_SHA'
# [END cloudbuild]

# [START cloudbuild-trigger-cd]
# This step clones the hello-cloudbuild-env repository
- name: 'gcr.io/cloud-builders/gcloud'
  id: Clone env repository
  entrypoint: /bin/sh
  args:
  - '-c'
  - |
    gcloud source repos clone hello-cloudbuild-env && \
    cd hello-cloudbuild-env && \
    git checkout candidate && \
    git config user.email $(gcloud auth list --filter=status:ACTIVE --format='value(account)')

# This step generates the new manifest
- name: 'gcr.io/cloud-builders/gcloud'
  id: Generate manifest
  entrypoint: /bin/sh
  args:
  - '-c'
  - |
     sed "s/GOOGLE_CLOUD_PROJECT/${PROJECT_ID}/g" kubernetes.yaml.tpl | \
     sed "s/COMMIT_SHA/${SHORT_SHA}/g" > hello-cloudbuild-env/kubernetes.yaml

# This step pushes the manifest back to hello-cloudbuild-env
- name: 'gcr.io/cloud-builders/gcloud'
  id: Push manifest
  entrypoint: /bin/sh
  args:
  - '-c'
  - |
    set -x && \
    cd hello-cloudbuild-env && \
    git add kubernetes.yaml && \
    git commit -m "Deploying image us-central1-docker.pkg.dev/$PROJECT_ID/my-repository/hello-cloudbuild:${SHORT_SHA}
    Built from commit ${COMMIT_SHA} of repository hello-cloudbuild-app
    Author: $(git log --format='%an <%ae>' -n 1 HEAD)" && \
    git push origin candidate
commit modifikasi dan push ke Cloud Source Repositories.
cd ~/hello-cloudbuild-app
git add cloudbuild.yaml
git commit -m "Trigger CD pipeline"
git push google master
Task 6. Review Cloud Build Pipeline
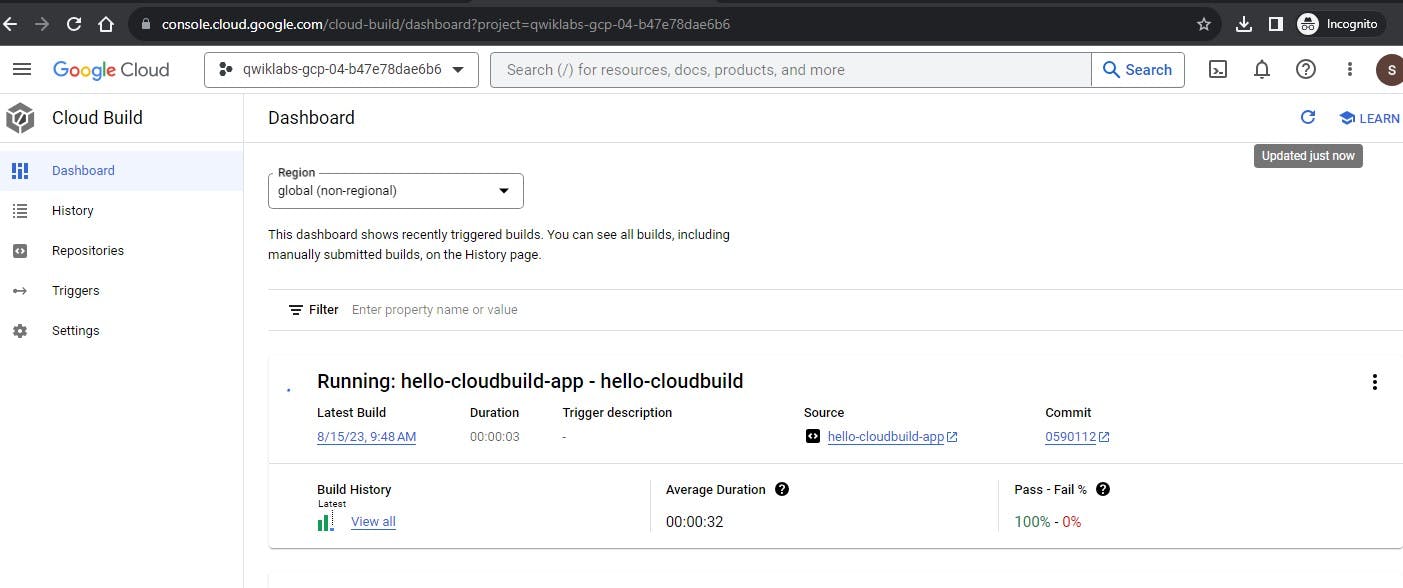
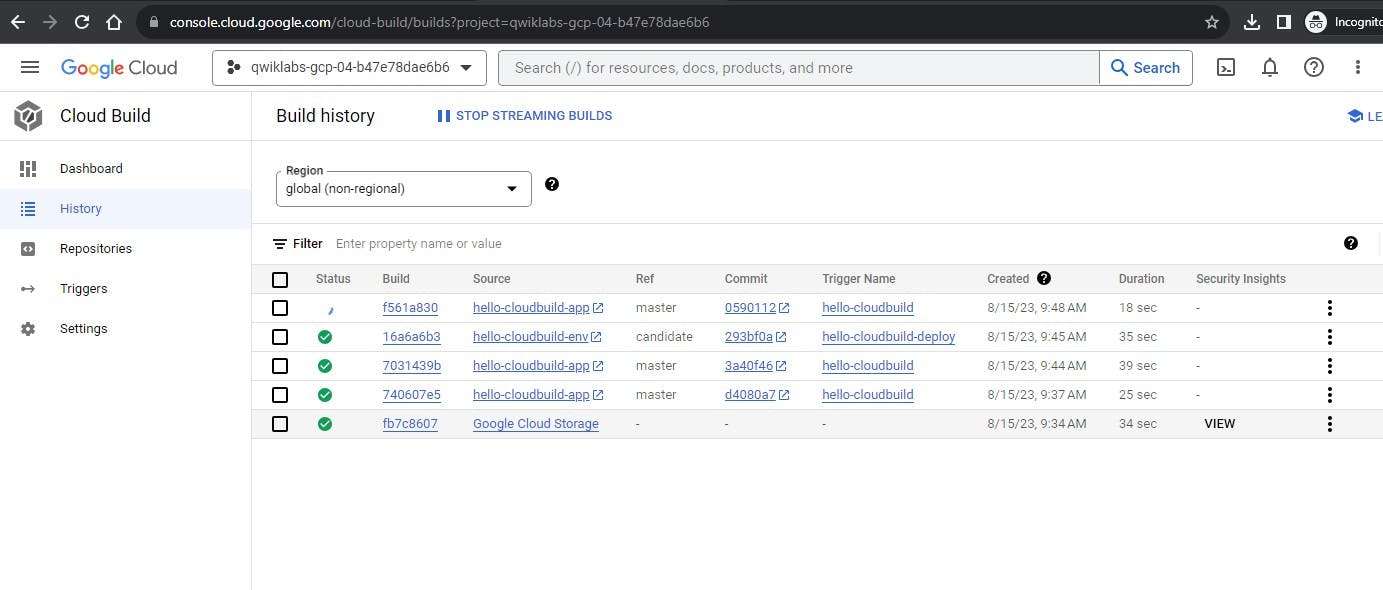
ke Cloud Build > Dashboard
Click Trigger dengan nama hello-cloudbuild-app, step terakhir pipeline ini akan push manifest baru ke repo hello-cloudbuild-env yang mana repo tersebut untuk mentrigger Continuous Delivery Pipeline.
Task 7. Test the complete pipeline
CI/CD pipeline sudah sempurna kita konfigurasi.
Pergi ke Kubernetes Engine > Service & Ingress
Pada bagian endpoint akan terlihat service hello-cloudbuild, biasa nya akan menunggu beberapa menit baru akan muncul IP Public sambil kita refresh. Jika sudah terlihat tinggal di klik akan muncul tampilan sederhana HTML.
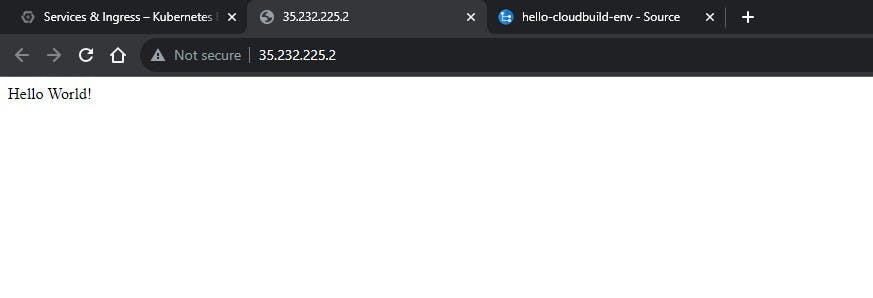
kita coba update HTML nya untuk mentrigger perubahan nya apakah work pipeline yang sudah kita buat tadi.
 cd ~/hello-cloudbuild-app
 sed -i 's/Hello World/Hello Cloud Build/g' app.py
 sed -i 's/Hello World/Hello Cloud Build/g' test_app.py
Commit and push to Cloud Source Repositories
 git add app.py test_app.py
 git commit -m "Hello Cloud Build"
 git push google master
Sesudah beberapa menit reload browser, and kita bisa melihat perubahan nya.

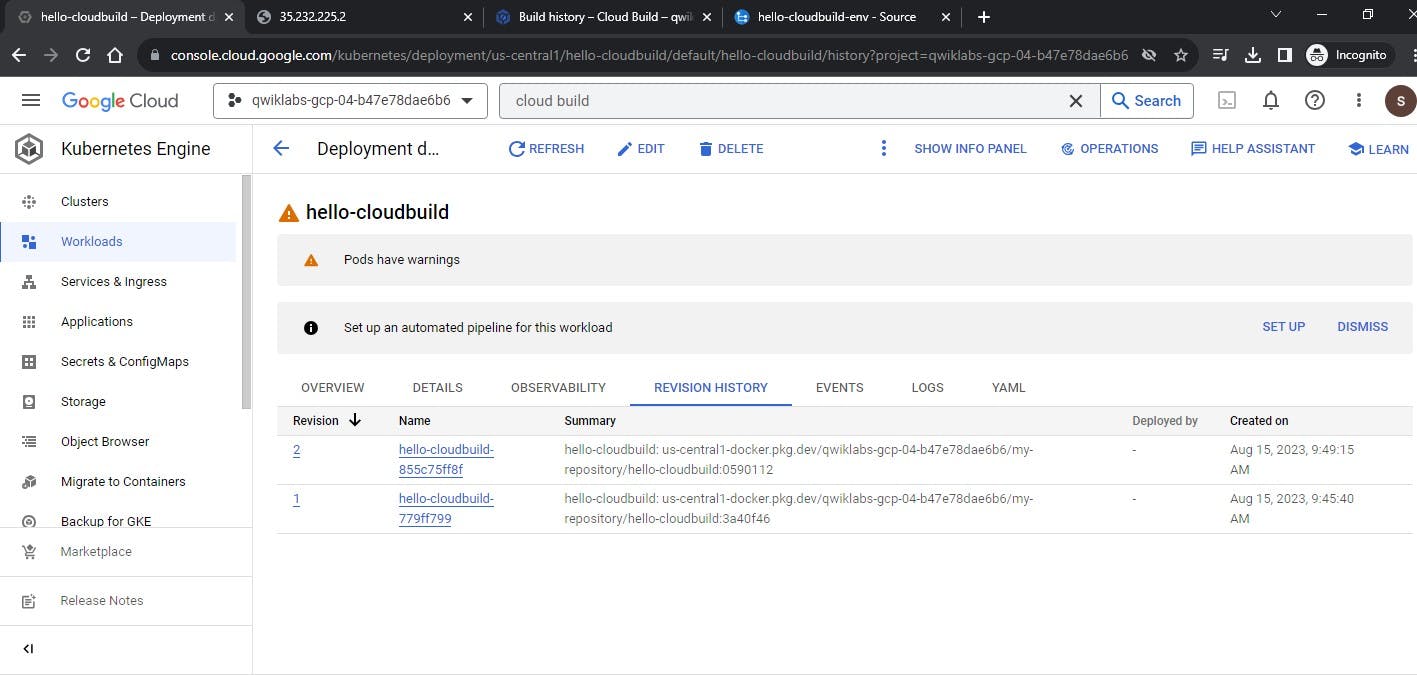
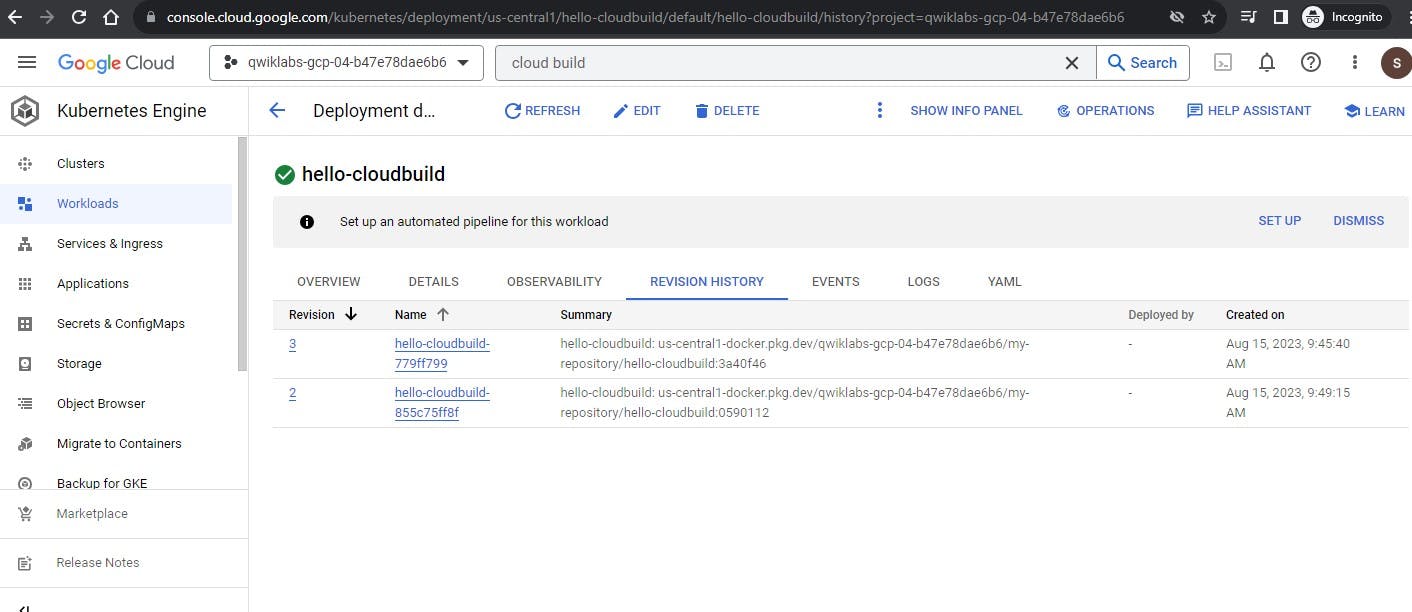
kita juga bisa melihat revision history, perubahan menjadi ke bagian 2
Task 8. Test Rollback
Pada task ini kita akan coba rollback versi aplikasi, ini di butuhkan jika suatu saat ada bug dalam aplikasi yang sudah di deploy bisa dengan cepat kita rubah kembali ke version sebelum nya.
Ke Cloud Build > Dashboard
Ke Bagian History, dan pilih image sebelumnya.
Click Rebuild
Jika sudah di bagian Kubernetes Engine > Workloads > revision history akan terlihat.
check browser reload.

Success !!


